

Now it is time to start sewing, or in other words, it is time for the fun to begin!
For this tutorial I wanted to use fabric from my stash, but didn't have enough of the green, hence my second color blocked dress in the last few weeks. Anyway, on to the sewing instructions for the bodice.
Bodice shell and bodice lining:
For this tutorial I wanted to use fabric from my stash, but didn't have enough of the green, hence my second color blocked dress in the last few weeks. Anyway, on to the sewing instructions for the bodice.
Bodice shell and bodice lining:


For added stability, apply strips of interfacing to each side of the center front lining where the button placket will be.
The following steps are used to assemble both the bodice shell and the bodice lining:
1) Sew center front pieces to side front pieces. Trim seam allowance and clip curves. Press toward center front.
2) Sew darts in back pattern piece, Press toward center back.
3) Sew back yoke to back. Trim seam allowance and press toward the yoke.
4) Sew front and back pieces together at shoulder seams. Trim seam allowance and press open.
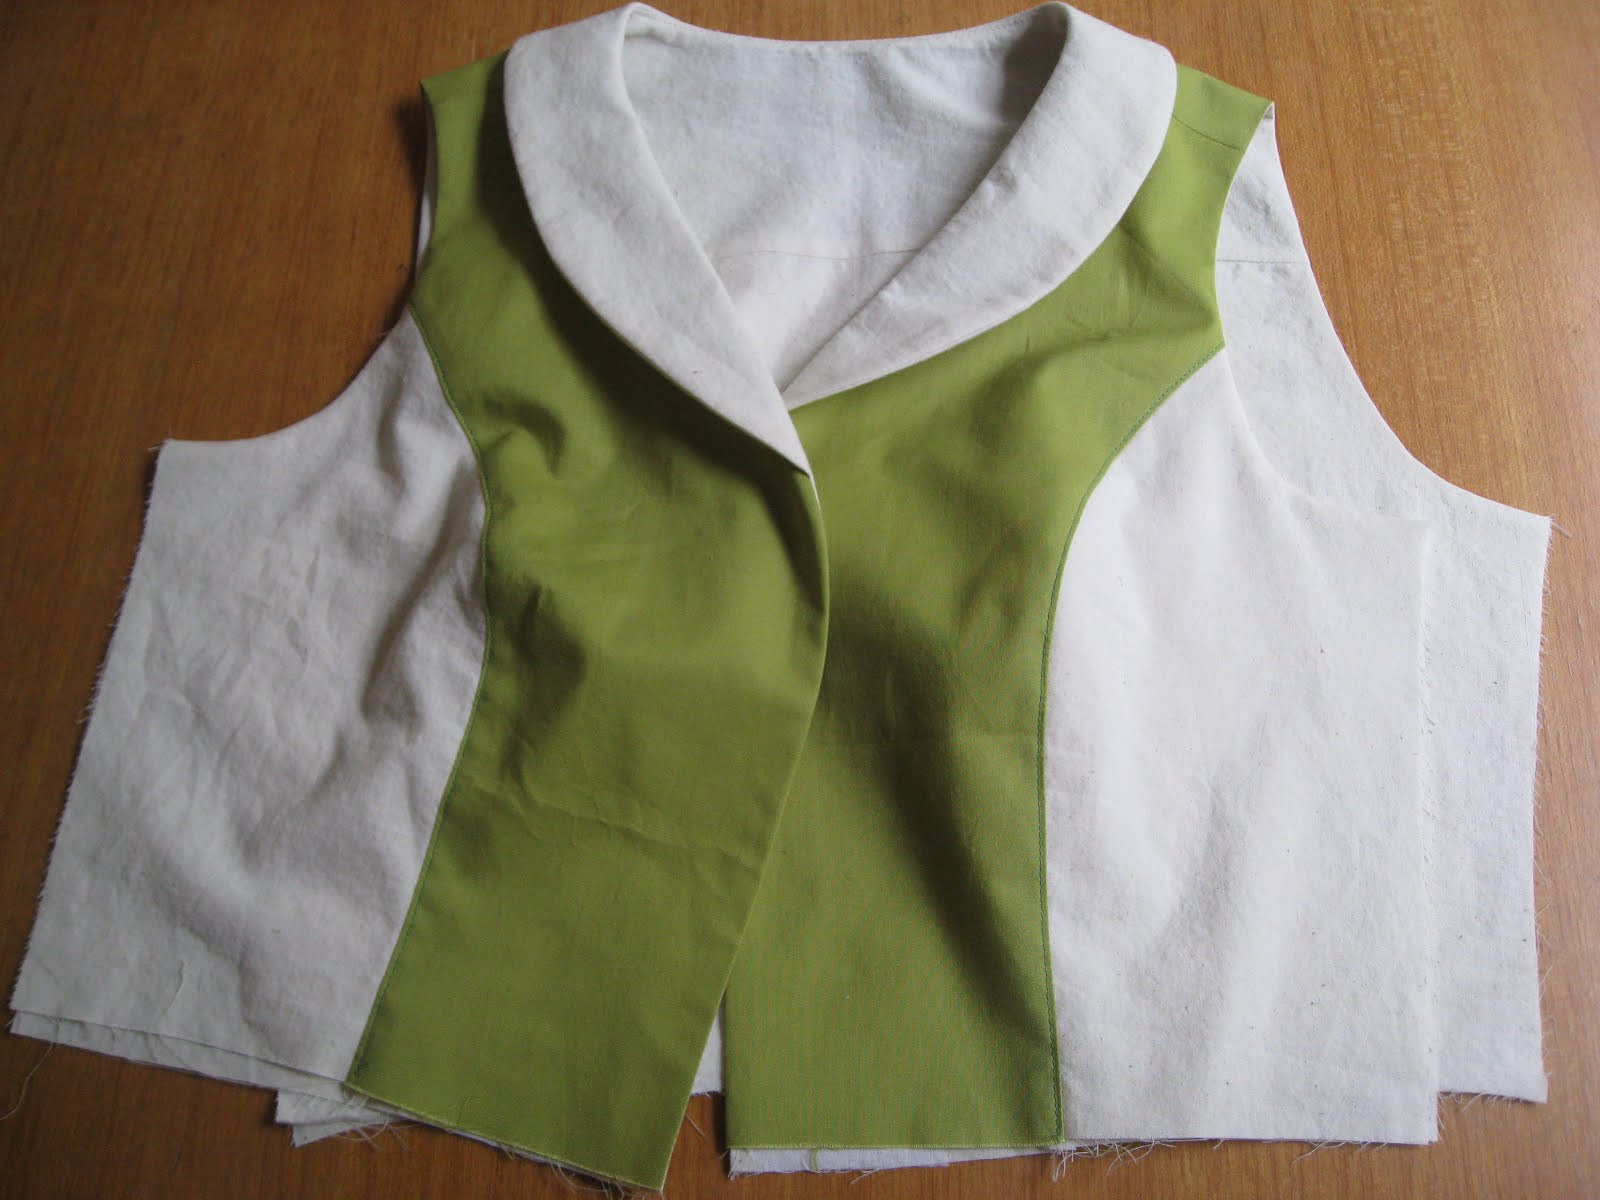
The collar and sewing the bodice shell to the bodice lining:
The following steps are used to assemble both the bodice shell and the bodice lining:
1) Sew center front pieces to side front pieces. Trim seam allowance and clip curves. Press toward center front.
2) Sew darts in back pattern piece, Press toward center back.
3) Sew back yoke to back. Trim seam allowance and press toward the yoke.
4) Sew front and back pieces together at shoulder seams. Trim seam allowance and press open.
The collar and sewing the bodice shell to the bodice lining:

1) Apply interfacing to wrong side of one collar piece.
2) Sew collar, right sides together, along outer edge.
2) Sew collar, right sides together, along outer edge.

3) Trim seam allowance and clip curves.
4) Turn collar right side out and press flat.
4) Turn collar right side out and press flat.

5) Pin collar to shell bodice, starting at center back.
6) Baste collar to neckline.
6) Baste collar to neckline.
7) Pin and sew shell bodice and bodice lining, right sides together, along neckline and down the center front. The collar is sandwiched between the shell bodice and bodice lining in this step.
8) Trim seam allowance and clip curves.
8) Trim seam allowance and clip curves.
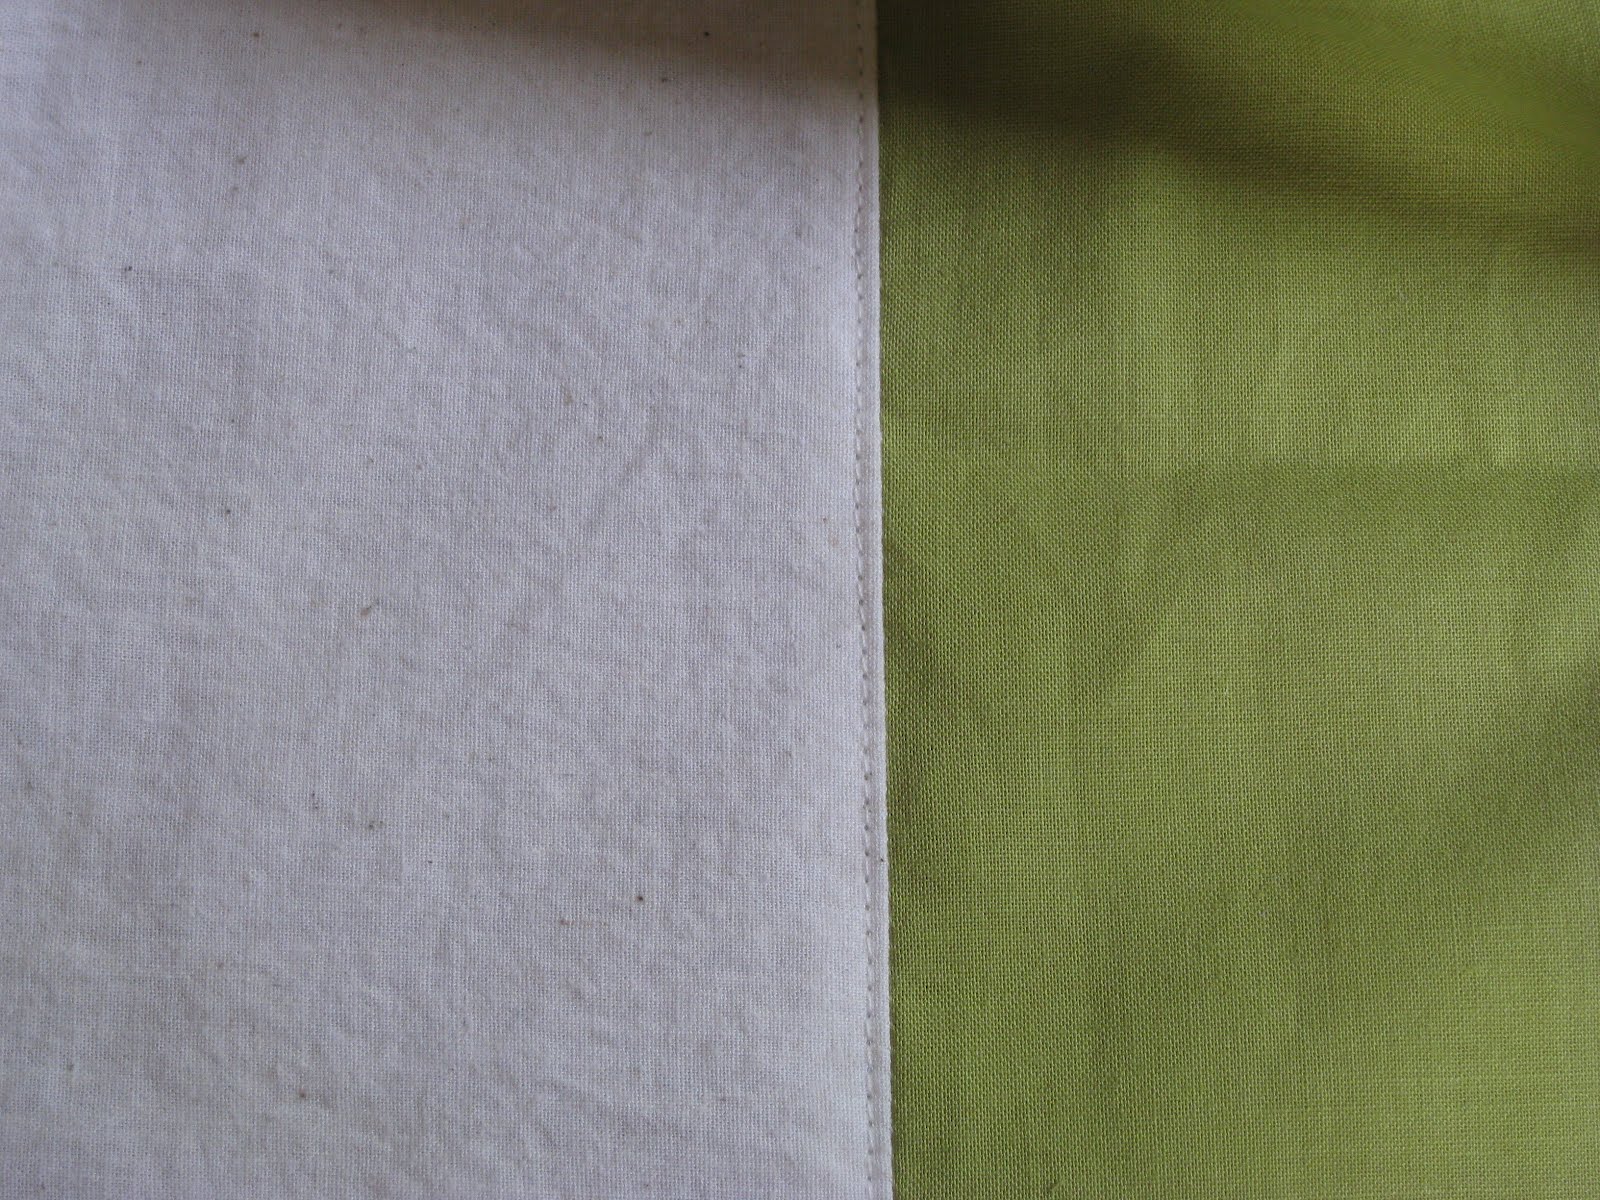
9) Press seam toward lining and understitch seam onto bodice lining. In the above photo, the white fabric on the left is the lining which you are sewing the neckline seam to.


10) With wrong sides together, press flat. Step (9) will make this easy and will leave you with a nice and neat neckline. The first photo shows the lining and the second photo shows the bodice shell.
The armholes:

1) Turn bodice inside out, with right sides of bodice shell and bodice lining facing.
2) Starting at shoulder seams, pin and sew the armhole of the bodice shell to the armhole of the bodice lining.
3) Trim seam allowance and clip curves.
2) Starting at shoulder seams, pin and sew the armhole of the bodice shell to the armhole of the bodice lining.
3) Trim seam allowance and clip curves.
4) Turn to right sides out by pulling the front bodice pieces through the shoulder straps you have just created.
5) Press armholes flat.
5) Press armholes flat.
The side seams:

This dress has a side zipper closure, so only one side seam will be sewn completely at this time.
For the side seam that will be complete:
1) With right sides together, pin side seam of lining back to lining front and continue through pinning the side seam of shell front to shell back. Sew.
2) Trim seam allowance and press open.
3) Turn right side out and press side seam.
For the other side where the zipper will be sewn in later:
1) With right sides together, pin front to back at armhole seam.
2) Sew only 2 inches out in each direction from the armhole seam.
3) Press seam open.
4) Turn right side out and press side seam.
This side seam should look like the one in the photo above.
And that's it for the bodice! Next time we will work on the skirt!
This dress is going to be fabulous when completed, can't wait to see the rest!
ReplyDeleteOooh, I am so intrigued. I think it's going to be awesome. I just can't wait to see it all put together.
ReplyDelete