Showing posts with label Tie Dye. Show all posts

Saturday, September 28, 2013

More Tie Dye and a Hemlock Tee

I was fortunate to spend part of my week camping along the California coast, and I have to admit I spent more than a day in my comfy new Grainline Hemlock Tee. I'm still a bit intimidated by knits and my serger, but I decided to get over it and make this tee, and I'm so happy that I did! The pattern is quick to make and the finished result is just the right amount of slouchy and comfortable.

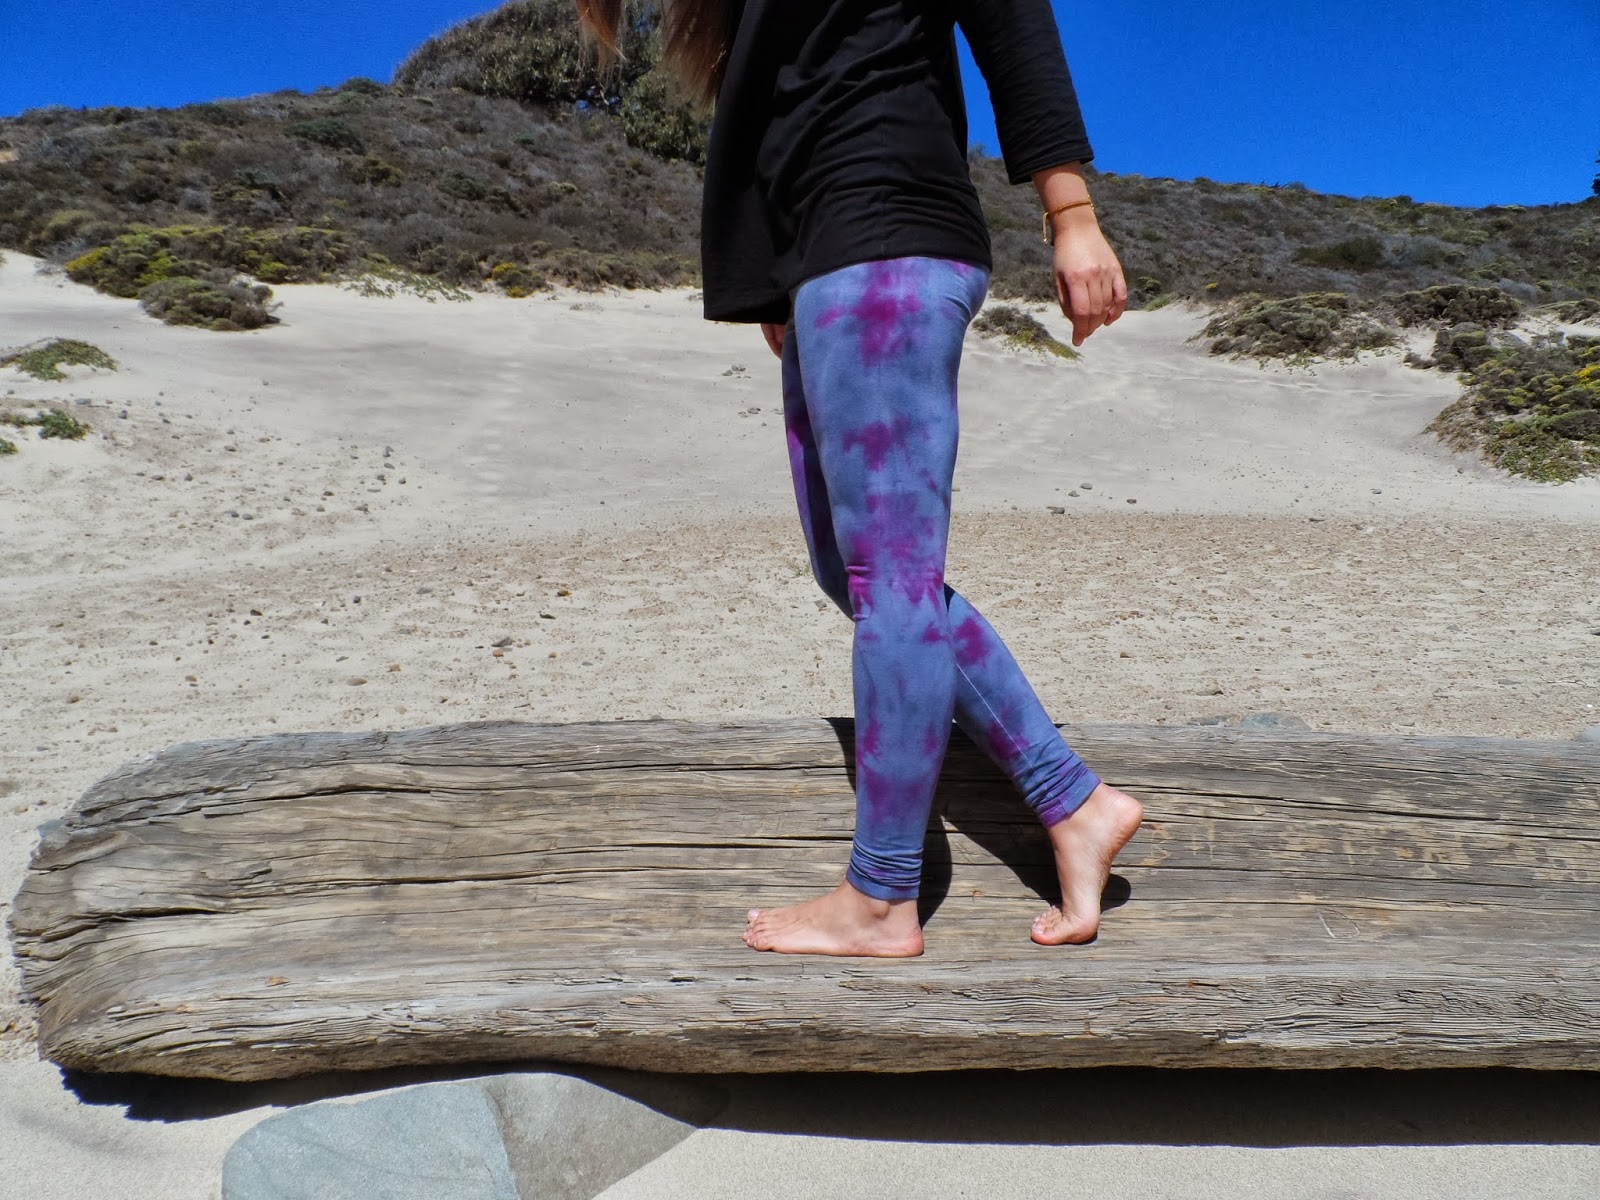
The other part of this outfit are my new favorite leggings! Well sort of, I love the tie dye, but the pattern needs some adjustments. I used BurdaStyle's Carol Leggings pattern since I already had it in my pattern collection. I'm planning on reading some tutorials to adjust the fit for the next time. The leggings are made from white stretch cotton that I tub dyed gray and then tie dyed with black, fuschia, and deep purple. 


Tuesday, September 10, 2013

Tie Dye Elisalex


When I was living in my grandparents house I had a pretty set routine when it came to sewing and blogging. With ready access to a washer and dryer I could wash fabric as soon as I bought it and get straight to work sewing, and easily work on special dye projects. Once I made something new I would just head out to the back porch with my tripod and camera for some blog photos. 

My new apartment has made a change in my routine. I have to wait patiently for our trips to the laundromat in order to prepare my fabric for sewing, it's torture! But on the other hand, I'm finding that having to search for a special spot for photos is rather enjoyable. Yesterday while we were out on an evening run I spotted these hydrangeas and knew they would make the perfect backdrop for my latest Elisalex dress!

I recently purchased the book "Tie Dye: Dye It, Wear It, Share It," by Shabd Simon-Alexander. I've been in awe of her work for quite some time, so I was excited when I found out about her book. This dress is made from an out of use curtain that I tie dyed using a technique from the book that involves folding like a fan, binding with string, and then dyeing. Once the dye process was complete, I reached for my Elisalex Dress Pattern from By Hand London. I love the bodice of this pattern, but yet again my fabric didn't lend itself to the structured skirt so I substituted a simple gathered skirt. This finished dress is exactly what I imagined for the fabric, so I'm one happy camper.

PS: Any of you other lovely sewing bloggers have tips for feeling comfortable taking project photos out in public? I'm still feeling a bit shy!


Tuesday, April 30, 2013

Sewing for the home

This project combines two things that I almost never work on, home sewing and quilting. And even though these pillows are out of my ordinary sewing habits, I really enjoyed making them.

After it was decided that my family was going to sell my grandparent's house, I asked if I could have one of my favorite pieces of furniture from their house. It's a wood frame modern danish couch with dark blue cushions. While I was living with my grandma the past few years this couch was in front of the living room picture window overlooking the park. I loved sitting there with a blanket, book, and cup of tea while my grandma read the newspaper in her go-to arm chair. (Pictured in the project photos is the desk chair that matches the couch).

Once I moved to my boyfriend's apartment, I decided to make some pillows to go with my favorite couch. I used some of my own tie dye cotton plus a thin linen curtain I found in my grandma's closet while we were clearing out the house. I played around with some triangles and tried my hand at quilting! Quite fun actually! Both have linen for the back with an overlapping flap and bronze snap closure. 

If you would like to make a zig zag pillow, head over to the blog Oh, Fransson! by Elizabeth Hartman. My interest in trying out some quilting was sparked by the tutorial on Piano Pillows.

My heart aches when I think about how I will no longer be able to visit my grandparent's house. However, I'm happy to incorporate some of their furniture with my own as a reminder of all the wonderful times I had there with them.


Saturday, July 28, 2012

Mission Maxi Plus the Color

 I've been wearing my Mission Maxi dress nonstop since I put it together, and now I finally took pictures to share on my blog!

My Mission Maxi was made from white cotton jersey which I tie dyed after the sewing was complete. For the tie dye I used two shades of black, plus pearl gray. I'm pretty happy with how the dye turned out, but I wish there weren't so many white spots.


My cousin and I also did the ombre dyeing for her dress, but she just took off to medical school in New Orleans, so I'll have to get her to send me some photos of her dress when she gets a chance. Do you like our ombre dyeing setup? Liz likes to follow directions when doing projects like this, but I made her get straight to it without measuring things out precisely. Her dress turned out great and we both had blue hands when we went to work the next day. Oops!

Tuesday, May 29, 2012

A Tower of 21 Tie Dye T-shirts

 For the past few months I have been working as a teacher for an after school program and I have my own class of first and second graders. For our big Spring performance I decided to do something fun for our costumes: matching tie dye shirts! 

The kids did their own work rubber banding their shirts and choosing their colors, but I applied the dye so that I didn't have to send kids home to their parents all messy and stained. We did a refresher lesson about primary colors the day before, so the kids got to choose from red, yellow, and blue dye for their shirts. This kept it simple with only three colors and it tested their knowledge of how secondary colors are mixed.

Today I handed out the finished shirts to the class and the kids wore them for the song and dance that our class came up with for the performance. I have my ups and downs with teaching my class, but tonight I felt so proud and happy for them while they were on stage singing along to the song "Put a Little Love In Your Heart."


Sunday, June 12, 2011

June 12

Since all of my pajama photos so far have been based around a clothes line on the back porch, I thought it was time to let you guys see some shots of the pajamas in action.
So here I am in my turquoise and lilac tie dye pajamas with my teddy Natalie, who agreed to model with me.


As I said before, the tank top pattern is an alteration of Grainline's amazing Tiny Pocket Tank and the shorts are an alteration of BurdaStyle's Jane pajama shorts.

Saturday, June 11, 2011

June 11

And now, presenting the after photos! Matching tie dye pajamas! I'm so pleased with how they turned out!


The colors are a bit more subdued than I expected, but I think this works well for the pajama sleepy time look. Or as my sister pointed out, if they were too bright you wouldn't be able to fall asleep while wearing them.

The final missing touch that I want to work on for this project is a label. I'm thinking of making a stencil and using some paint to stencil it directly onto the pajamas.
Does anyone out there have a good method for making handmade labels for handmade clothing? I would definitely appreciate some tips, tricks, and creative ideas!

Tuesday, June 7, 2011

June 7

Lately, most of my sewing time has been spent working on a big pajama project.
I'm going on a vacation with two of my best friends this month, so I thought it would be fun for us to have matching pajamas. And then I thought, why not make matching pajamas for my sister and cousin who both have birthdays coming up?
I have now made 5 pairs of matching tank tops and shorts. Phew!


For the tank tops I used Grainline's Tiny Pocket Tank pattern, but altered the back by adding a big cutout and crisscrossed straps.
The shorts were based on the Jane pattern from BurdaStyle. I altered the shorts pattern by rounding off the corners on the side seams, adding bias binding all around the leg openings, and using a few rows of encased elastic for the waistband.
I used french seams and a bunch of bias binding so that everything is nice and neat.

After playing around with a few ideas for the fabric, I decided to use plain white cotton so that I could tie dye the pajamas! I guess this means that the above photos are "before" photos.
This afternoon was spent soaking fabric, mixing dyes, tying up fabric in tons of rubber bands, and finally dying! So much fun! I wish I could have a full time job working on tie dye.
I have to wait a full 24 hours to unwrap the tie dyed pajamas, but I'm sure they turned out great! I'm sooo excited! Stay tuned for "after" photos!


If you want to see some tie dye in the meantime, you can look at my Tie Dye Inspiration board on Pinterest!

Wednesday, May 19, 2010

May 20

Finally! Tie dye!
The process started yesterday...

The dye.

Pouring!

Mixing!

Soaking!

Scrunching and twirling!

Tying!

And a very important step, dyeing!

And a step I missed, putting on gloves... oops.

And then waiting! So much suspense for 24 hours.

But finally today, untying and rinsing! (followed by washing and drying, but I doubt anyone wants to see a photo of a washing machine).

And lastly, admiring!

Tie dyeing was super fun! Clare and I are already wondering what else we can dye.