Showing posts with label Halloween. Show all posts

Monday, October 31, 2011

Happy Halloween!

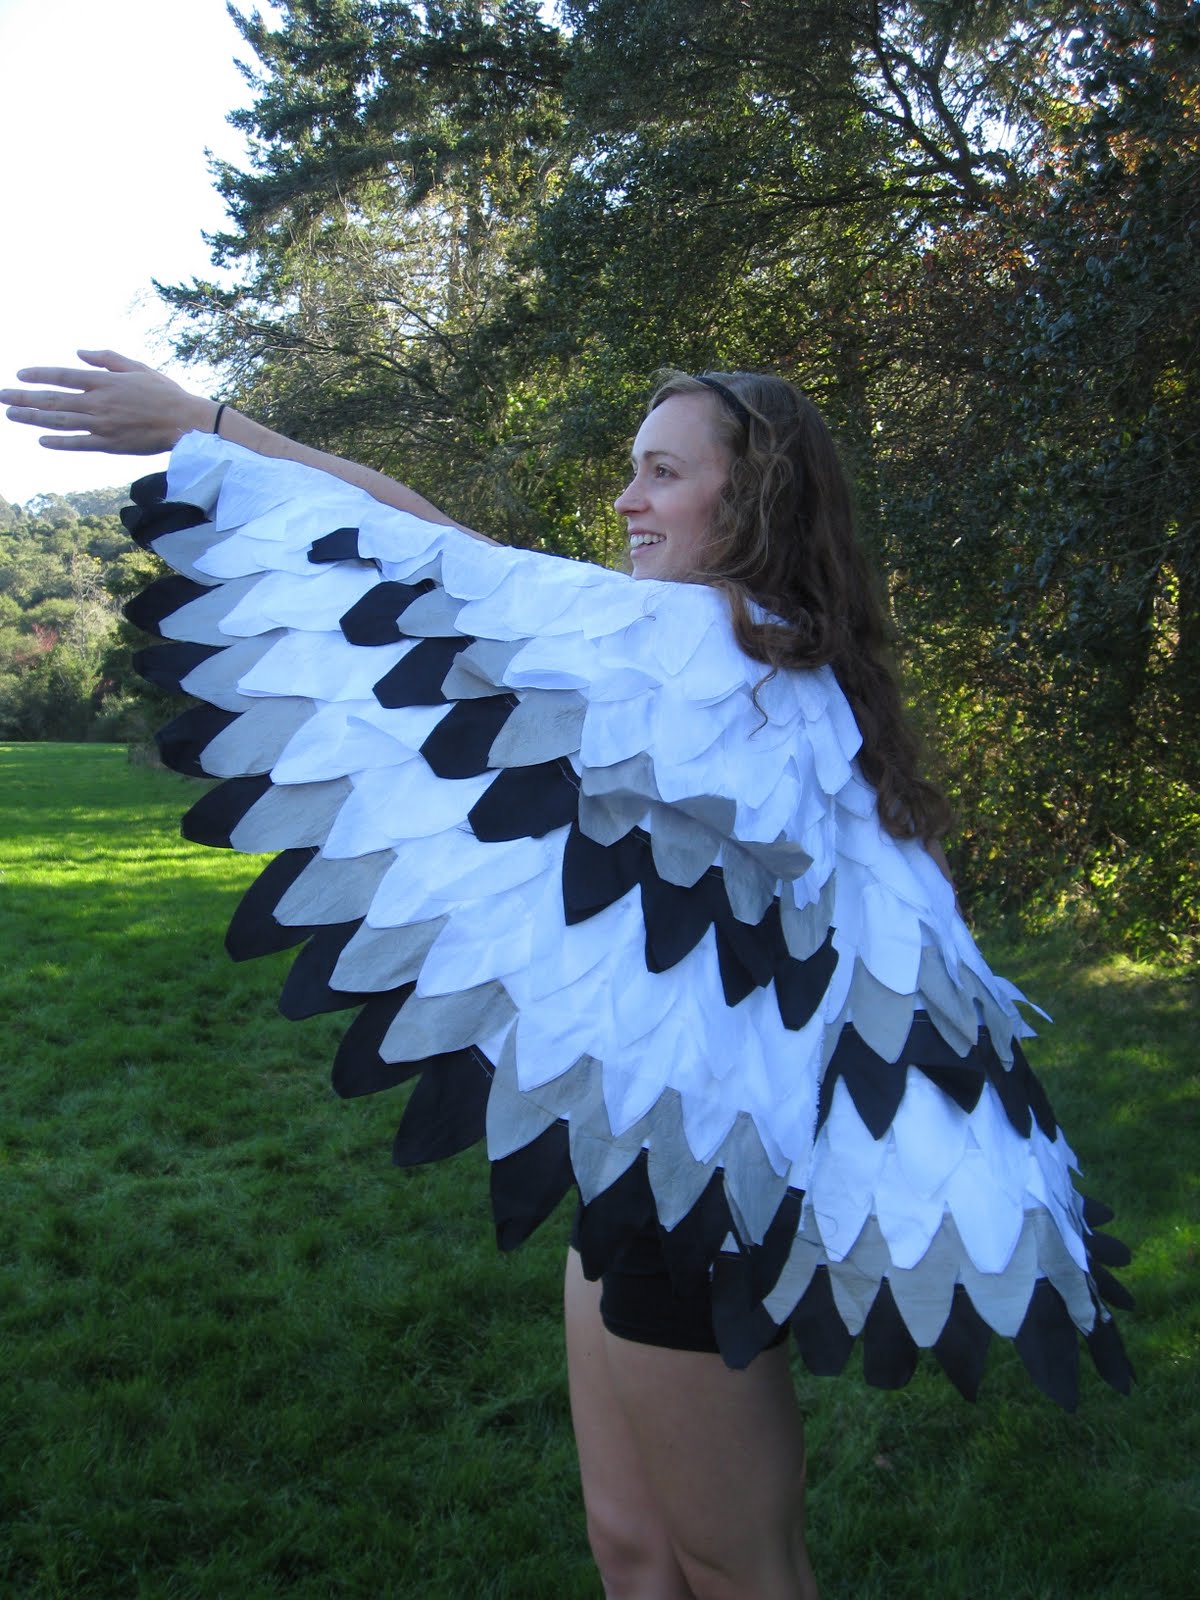
Today I am a flower!

And my cousin Liz is an owl!

I made a flower petal head piece out of felt and I sewed a circle wrap skirt with big leaves on top.

Liz and I made her owl wings by following my bird wing tutorial. They took longer than usual because when they were all finished we realized we had made two left wings! That's what you get for sewing while watching scary movies! We ended up having to dismantle and redo one of the wings.


And just for fun, I dug up a Halloween photo of Liz and I that must have been taken about 20 years ago. Looks like I was a bat carrying around a goblin head? Interesting...
Happy Halloween!

Sunday, October 2, 2011

Birds of a Feather Costume Tutorial, Part Four

With the wing bases ready and the many feathers cut out, we are now in the home stretch of this tutorial! Time to sew the feathers onto the wing bases!

Lay out your wing bases and begin by playing around with placing and layering your feathers. Do this without pinning the feathers down so that you have full freedom of movement to see what arrangement you like best. The placement of the feathers on the wing bases is completely up to your imagination, but I've put together a few tips in this tutorial that you can refer to.

The above diagram maps out my general approach to layering the feathers in my original costumes. The bottom most layer is along the curved edge (C) and is positioned to stick out over the edge so that you can see it peaking out from the other side of the wing.
The layers that follow slowly change from curved to straight since I wanted to finish with feathers running straight across the top edge (A). Also, on the top edge, I opened the double layered feathers up so that they would show on both sides of the wing.

Above is a view of the back of the wing. Notice the layer along curved edge (C) peaks over, and the layer along the top edge (A) is showing by opening feather sets and placing each layer on either side of the edge.

Also, the thread color should match your wing base color on this side so that your stitching isn't too noticeable.

Try staggering each row of feathers to make the layering more effective and interesting.

Remember that you don't have to use each set of feathers as a set of four. If you get to a spot that could only use two feathers, go ahead and cut a set in half to two feathers.

Leave some space between each row. These blank spaces are covered with well placed staggering.

Once you have figured out your general idea for layering, leave one wing base set up with the feathers in place as a guide, and begin sewing down feathers on the other wing base. Sew the feathers down row by row beginning along the curved edge (C).

Once all feathers are sewn down to your liking, sew on two loops of fabric to both wings, one on each end of the top edges (A).
The loop at the corner where the top edge (A) and the curved edge (C) meet is meant to help attach the wing to your wrist. I found it easiest to use old hair ties through these loops which slipped around my wrists easily when I was putting on the wings.
The loop at the corner where the top edge (A) and the side edge (B) meet is meant to help attach the wings to your neck. Pass a ribbon through these loops on each wing, as shown in the drawing, and tie the ribbon around your neck. If this is uncomfortable, use the loops to pin the wings to your clothing instead.

And there you have it! Two beautiful bird wings! So tie them on and start flapping!

Thanks for reading my first ever tutorial. I had a great time putting it together and I hope that it inspires some great costumes for Halloween this year. If you do find inspiration in this tutorial, let me know! I'd love to see some photos!

Saturday, October 1, 2011

Birds of a Feather Costume Tutorial, Part Three

Now that your wing base is all set, it's time to get to work on the feathers!

To make the process of wing construction faster, the feathers are created in sets that are double layered. For my original costumes I used sets of four feathers in a row, which I will also use in this tutorial, but once you have the basic idea, you can change it around any way you would like for your wings.

To cut even feathers of uniform size, we are going to create a paper feather template.

Take two pieces of paper of equal size (here I am using standard 8.5''x11'' printer paper) and cut one in half, hot dog style as shown above. Take one piece of the cut paper and set the rest aside.

Draw a line one inch down from the top edge.

Draw lines dividing the piece of paper into four equal sections. This paper is 11 inches long so each of the four sections will be 2 and 3/4 inches.

Draw in the feathers in each of your four sections making sure not to go past the top inch that was marked off earlier since you will be using the top edge to cut along a fold.
Have fun with this step and play around with different shapes until you find one that you really love!

Cut around the edges to complete your feather template! At this point you could also transfer the template onto thin cardboard or card stock to make it more durable.

Start cutting out fabric!
Get the full sheet of paper that we set aside earlier and use it to cut out a large rectangle. Using an iron, press the rectangle of fabric in half hot dog style.

Place your feather template on the pressed piece of fabric with the top edge along the fold and cut. I highly recommend using a rotary cutter for this step since it makes the process very quick.

A double layered set of four feathers!

And what it looks like unfolded for clarity.

Continue using your full sheet of paper and your feather template to cut out more sets of feathers!
This part of the project is a bit repetitive and time consuming, but it is well worth it in the end. So turn on your favorite music and get lost in the feathers!
Also, as you are working, try not to stress about cutting exactly from the template. Remember, the wings have many layered feathers and they don't all have to be perfect.

Next time we will work on sewing the feathers to the wing base!

Friday, September 30, 2011

Birds of a Feather Costume Tutorial, Part Two

Now that you have decided on your bird alter ego, chosen your colors, and selected your fabric, it is time to get started on wing construction!

The main components of the bird wings are the feathers and the wing base, so let's start with the base. You will be creating two separate wing bases, one for each arm, both in the basic shape of a right triangle as shown in the photo:

In order to cut out your two wing base triangles, you will have to take some measurements:

Hold your arm out like you are flying and have a friend measure from the middle of your shoulder blades out to your wrist. This will be the top edge of the triangle (A).

Have your friend measure from the same spot between your shoulder blades down the middle of your back to the desired length for your wings. This will be the side edge of the triangle (B).

For the hypotenuse of the triangle, (C), I used a curved edge connecting the ends of (A) and (B), however you can make this line straight if you wish.

Now mark your triangle measurements onto your fabric and cut out your two base wing triangles. As a flamingo my main color was light pink, so I used pink fabric for my base wing triangles.

Once the wing base triangles are cut out you can fold in the edges twice narrowly to finish them if you would like. For my wings I cut edge (B) along the selvage of my fabric, narrowly hemmed edge (A), and left edge (C) raw.

Well there you have it! Two beautiful wing base triangles! In part three I will explain how to make the template for cutting out your many, many feathers!

Thursday, September 29, 2011

Birds of a Feather Costume Tutorial, Part One

With Halloween just around the corner, and questions from my readers about the construction of my costume from last year, I've decided it is time to put together a tutorial!
How about we get started at the very beginning?

Choose your bird!
Flamingo, parrot, toucan, imaginary technicolor falcon! The possibilities are as endless as your imagination.

Choose your colors!
The easiest way to do this is to research your bird. Look through photos to help figure out the main colors that you will be using.
After looking at photos of flamingos I decided to use a light pink as my main color plus a darker pink, red, and white for the other feathers. For the parrot costume, I looked at photos of scarlet macaws which helped me to choose colors and see the placement of those colors on the wings.
At this point, you can also read about your bird for added costume enjoyment! Learn about where your bird is from, what it eats, and how it behaves in its' natural environment so that you can truly get into character once you're all dressed up!

Choose your fabric!
The edges of the feathers and wings are left unfinished, so try to pick something that won't fray too much. When looking at fabric, imagine how it will look as a finished wing. You will probably want something that moves, flows, and flaps nicely. Also, try not to choose anything too heavy since you will be sewing many layers of feathers to each wing.
For my costumes I bought inexpensive, lightweight polyester in bright colors with a satin finish.

I hope these tips help you get started on brainstorming, and stay tuned for the next part of the tutorial!

Saturday, November 6, 2010

November 6

A few more photos of the Halloween costumes that I made!


Monday, October 25, 2010

October 26

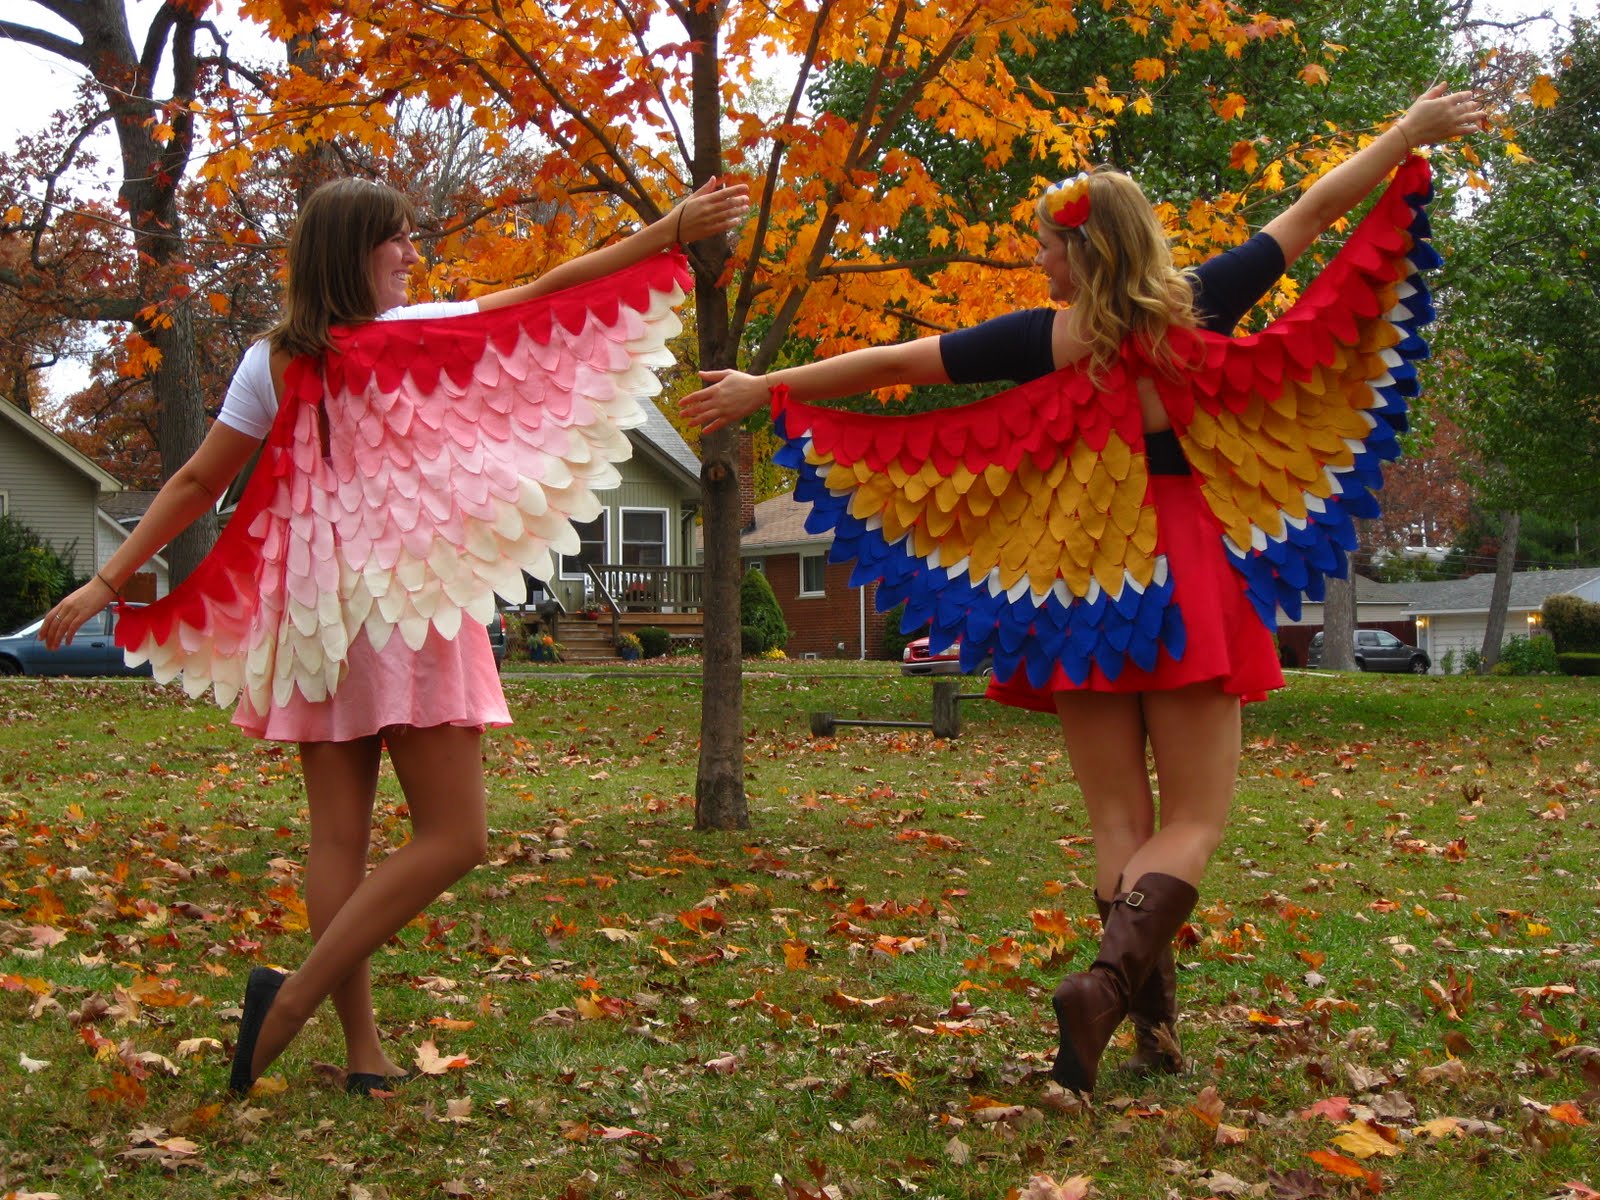
About a month ago I decided that I wanted to be a flamingo for Halloween, but with the holiday getting closer and without having worked on a costume I decided to give up on the idea. This changed on Saturday afternoon when my friend Malia called and convinced me to get to work. Since we will be together on Halloween this meant making a costume for her as well. Since I had decided on a flamingo, she joined the bird theme and decided to be a parrot. After our phone conversation I went to the fabric store and purchased tons of silky fabric in six different colors, and then spent the next few days working on the costumes.

On Saturday I made a red circle skirt for Malia and a pink on for myself.
On Sunday I made one flamingo wing with white, pink, and red feathers.
And since I didn't work on Monday, I put together the other three wings.

So now I can answer the question, how many feathers are on the wing of a bird?
By my calculations, a hell of a lot.