Showing posts with label Tops. Show all posts

Saturday, September 28, 2013

More Tie Dye and a Hemlock Tee

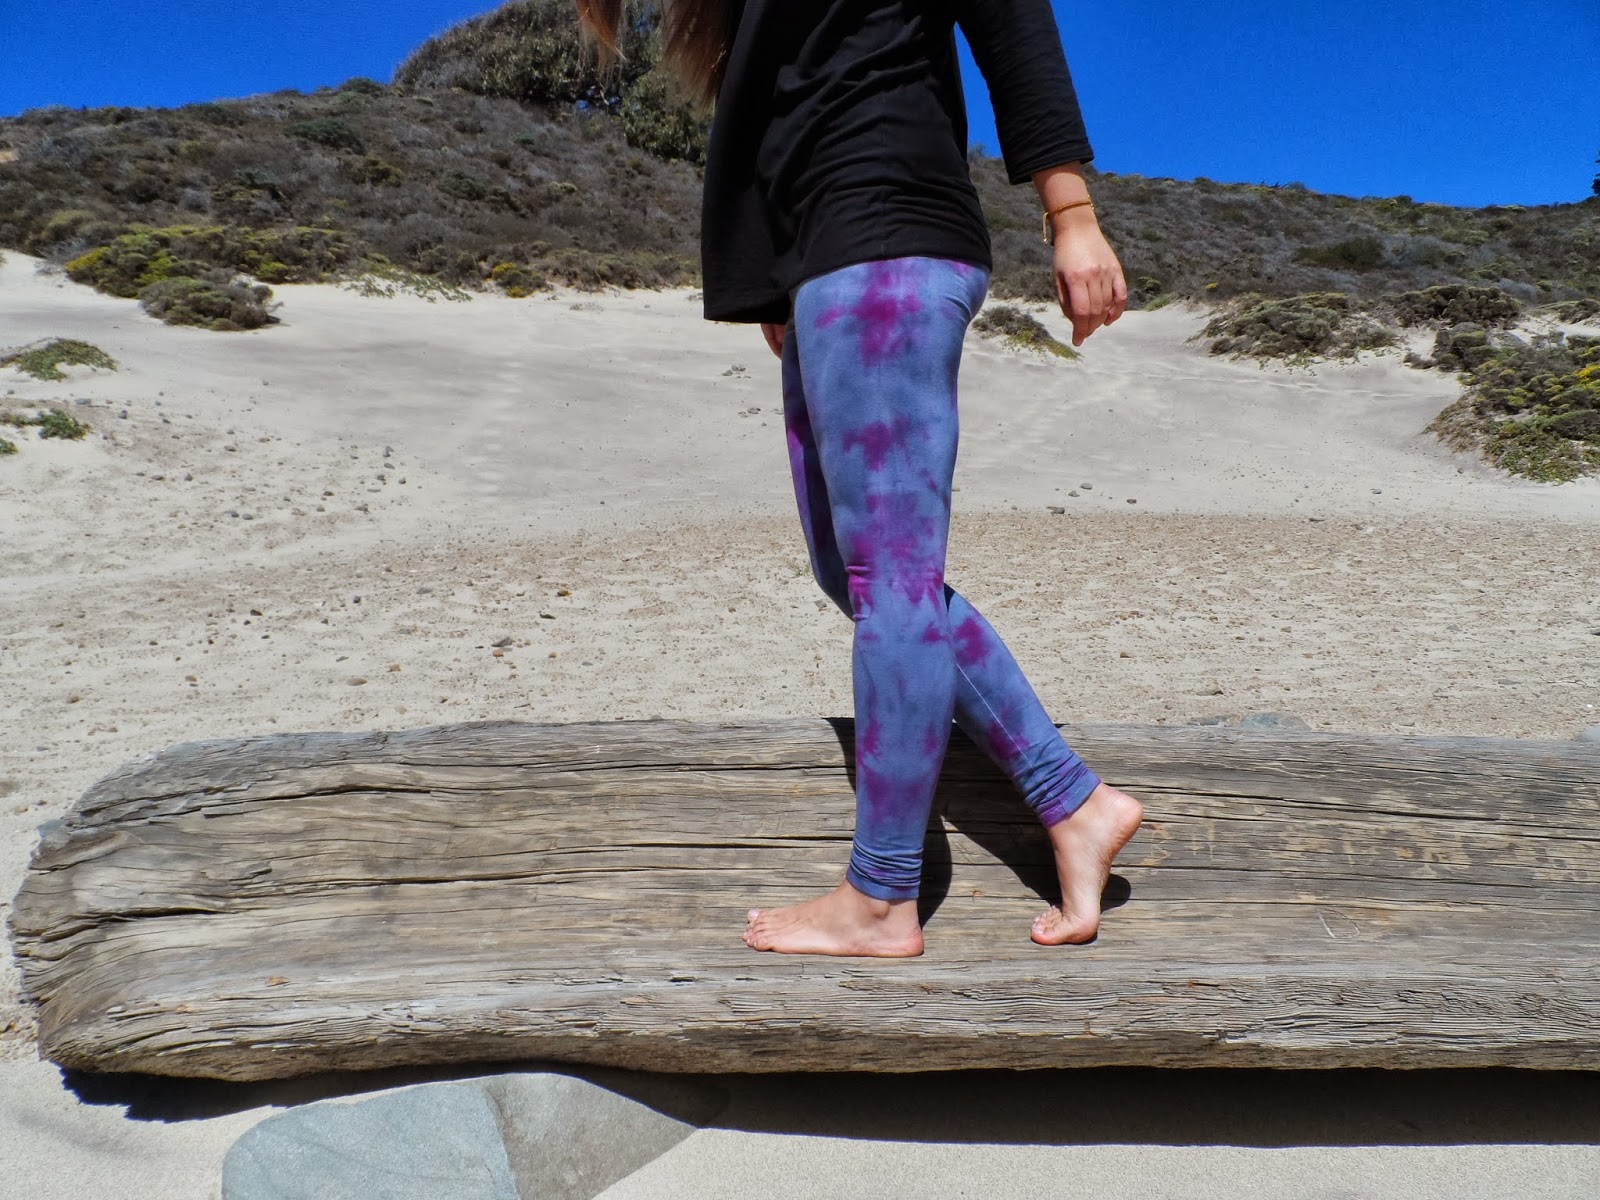
I was fortunate to spend part of my week camping along the California coast, and I have to admit I spent more than a day in my comfy new Grainline Hemlock Tee. I'm still a bit intimidated by knits and my serger, but I decided to get over it and make this tee, and I'm so happy that I did! The pattern is quick to make and the finished result is just the right amount of slouchy and comfortable.

The other part of this outfit are my new favorite leggings! Well sort of, I love the tie dye, but the pattern needs some adjustments. I used BurdaStyle's Carol Leggings pattern since I already had it in my pattern collection. I'm planning on reading some tutorials to adjust the fit for the next time. The leggings are made from white stretch cotton that I tub dyed gray and then tie dyed with black, fuschia, and deep purple. 


Thursday, April 25, 2013

Archer goes camping!

 I love Grainline Studio patterns, and the Archer Button Up Shirt pattern has already been added to my list of favorites! I've used it twice and took my wool version camping (and boating!) with me the past few days. The shirt is made from thrifted plaid wool and buttons from a creative reuse center.


Saturday, January 12, 2013

SPLIT BACK TINY POCKET TANK : THE TUTORIAL


 Anyone remember the Split Back Tiny Pocket Tank that I wrote about way back in July? I had at least one comment requesting a tutorial, so here we go!


The first thing that you will need is Grainline's Tiny Pocket Tank pattern, which is available for purchase online in a print at home format. This is seriously one of my all time favorite patterns. I have used it and altered it more times than I can count and I've never been disappointed with the results. 


STEP ONE : ALTER THE PATTERN

The best part of this tank variation is that you really only need to alter one pattern piece: the back. Begin by tracing the tank back face up on pattern paper. Next, flip the tank back face down and line up the center back of the pattern piece with the center back that you just traced. With the tank back face down, trace again along the neckline and up across the shoulder seam.


Using your straightedge, draw a line 3 inches away from the center back, shown above in red.


Using your straightedge, draw a line that is perpendicular to the red line and goes through the part of the pattern where the armhole and side seam meet. This line is shown above in gray. Note where the red line and gray line meet. This point of intersection will be used as a starting point for a curve.


Draw a curve from the intersection point mentioned above, to the bottom of the side seam. 


STEP TWO : CUT YOUR FABRIC


 Cut 1x center front on fold
Cut 2x altered back pattern piece. Place the original center back on the straight grain of the fabric. Also, make a mark along the neckline of each back piece to represent the placement of the original center back line. These marks will be lined up when we overlap the split back pieces.
Cut 1x neckline binding on bias grain.
Cut 2x armhole binding on bias grain.


 STEP THREE : SEW


For most of the sewing, you can follow the sewing tutorial from Grainline, but I will summarize my steps below.

Sew front darts and press. 

Use French seams to sew the sides and shoulders. 

Follow Grainline's tutorial to insert armhole bias binding on both sides.

At this point you will finish the hem of the tank. Don't forget that the "hem" of this variation runs all the way up along the curve that we made in the altered back pattern piece. I finished this hem using bias binding and Grainline's tutorial, but you can use your preferred hemming technique.

At this point all the edges will be finished, except the neckline, and the back will be open. Locate the marks that you made while cutting the back pattern pieces. Line up the marks and baste along the neckline where the two back pattern pieces overlap.
Finally, follow Grainline's tutorial to insert the neckline bias binding.

At this point you may also sew along the "hem" where the two back pattern pieces overlap. This will keep the split back from flying open.


STEP FOUR : ADMIRE YOUR WORK


Let me know if you end up making your own split back tiny pocket tank!
Happy sewing!

Thursday, July 5, 2012

Split Back Tiny Pocket

Another Tiny Pocket Tank? Don't mind if I do. I've used this pattern tons of times, but it just never gets old! 

For this version, I altered the pattern to have a split back. Once the tank was made I sewed the split down along the edge because it was a bit too loose and shapeless in the front to leave it open. If I make another with the split back, I think I'll have buttons going along the back edge for some added interest.

Anyway, it's just a simple, comfy tank that I love to wear!
 

I hope everyone had a wonderful Fourth of July holiday! It's kind of weird to have that one day off in the middle of the week, but I sure did enjoy it! I ended up going on a hike over to a lake for some lounging and swimming.

Saturday, January 7, 2012

Natty's Motorcycle Jacket

I made this wool motorcycle jacket back in November, but it gave me such a hard time that I've put off sharing it until now. For the pattern, I turned to my trusty BurdaStyle Sewing Handbook and followed the directions from Aicha's variation of the coat.

The great thing about this jacket is that it's made mostly from (big) scraps that were in my stash. I used this same gray wool for a men's flannel shirt that I made a while ago and somehow I managed to squeeze out just the right amount from the leftovers. The lining and hidden inside pocket are made from the heart print cotton voile leftover from a recent top. I did have to venture out to the fabric store for the black wool rib knit, black snaps, and black jacket zipper.

The part of the jacket that gave me a hard time was the collar. I hadn't used rib knit before and discovered that I need quite a bit of concentration and patience to sew it. In the end I conquered the rib knit, but the collar turned out a bit funky anyway. I swear I closely followed the directions for creating the collar pattern piece, yet it seems like it turned out too big. The jacket looks fine open, but the collar looks silly and floppy when it's zipped up. Oh well!


Friday, November 11, 2011

11|11|11

I like to listen to music while working on sewing projects, but yesterday I was reminded of why it's a good idea to pay more attention to what I'm doing rather than what I'm listening to.

Yep, I cut out two left sides for the shirt front. I only had a small piece of this fabric with one way print to work with so there was no way to correct the error.

Oh well! I kept going and completed the tank anyway.

I used Grainline's Tiny Pocket Tank pattern with some of my own alterations. I split the front and added a button placket all the way down, and I changed the back to have a rounded yoke at the top.

The cotton and buttons were both purchased from a creative reuse center.


On a side note, I read on Coletterie that today is Corduroy Appreciation Day because 11|11 is the day that most resembles corduroy! I love it!

So happy Corduroy Appreciation Day to you! And a Happy Veteran's Day as well.

Saturday, November 5, 2011

November 5

Going to the fabric store often results in buying fabric that you didn't know you needed, such as this heart print cotton voile that I couldn't resist. I used it straight away to make this top so that it wouldn't get eaten by my fabric stash.

It's hard to tell because of the print, but I used the sweetheart shaped yoke of Colette Pattern's Macaron Dress. I kept the front yoke as is and changed the back yoke so that it is split with a fabric covered button at the top for closure.

I love the fabric and the fit is so comfortable. I'm glad I went ahead with this impulse fabric purchase!


Sunday, July 31, 2011

July 31

My day consisted of staying home and sewing... my idea of the perfect day.

I spent most of my afternoon working as a one woman wallet assembly line fueled by tea, Van Morrison, and Radiolab.
The wallets were made following Verypurpleperson's wallet tutorial, which I've used a few times before. I used oilcloth and canvas lining, and I am giving them as thank you gifts.


The absolute best part about the wallets is hidden in one of the money pockets... a personalized tag! A few weeks ago Adrienne from All Style and All Substance sent me a package that included these clothing tags. Thanks Adrienne!

Once the wallets were done I went on to sew a simple shirt. I didn't have much fabric, so it turned into a crop top. By the time I was finished sewing, the sun was dipping below the horizon so I was unable to take any good pictures. However, I did take one inside as a sneak peek.


Saturday, May 14, 2011

May 14

Here's what happened to the cutout back top that I previewed on my dress form a while back. This top is the practice round of a dress idea that I've been wanting to work on.

I used Elaine May's Coffee Date Dress pattern from BurdaStyle to get started. I used the bodice front as is, but altered the back to have cutouts and buttons. I finished the edges with bias binding. The fit isn't quite right and I don't like the darts on the front, so I may go with a different pattern to make the actual dress.

I used some buttons and fabric that were already in my stash. I didn't have enough fabric for a skirt, so I added the silly little peplum. The result: a shirt that looks like something I would have worn as a six year old... but it's kind of fun too.


Photos by Bennett.

Thursday, December 9, 2010

December 10

I got some sheer rose print fabric from Thrift Town recently and used it for two different projects.

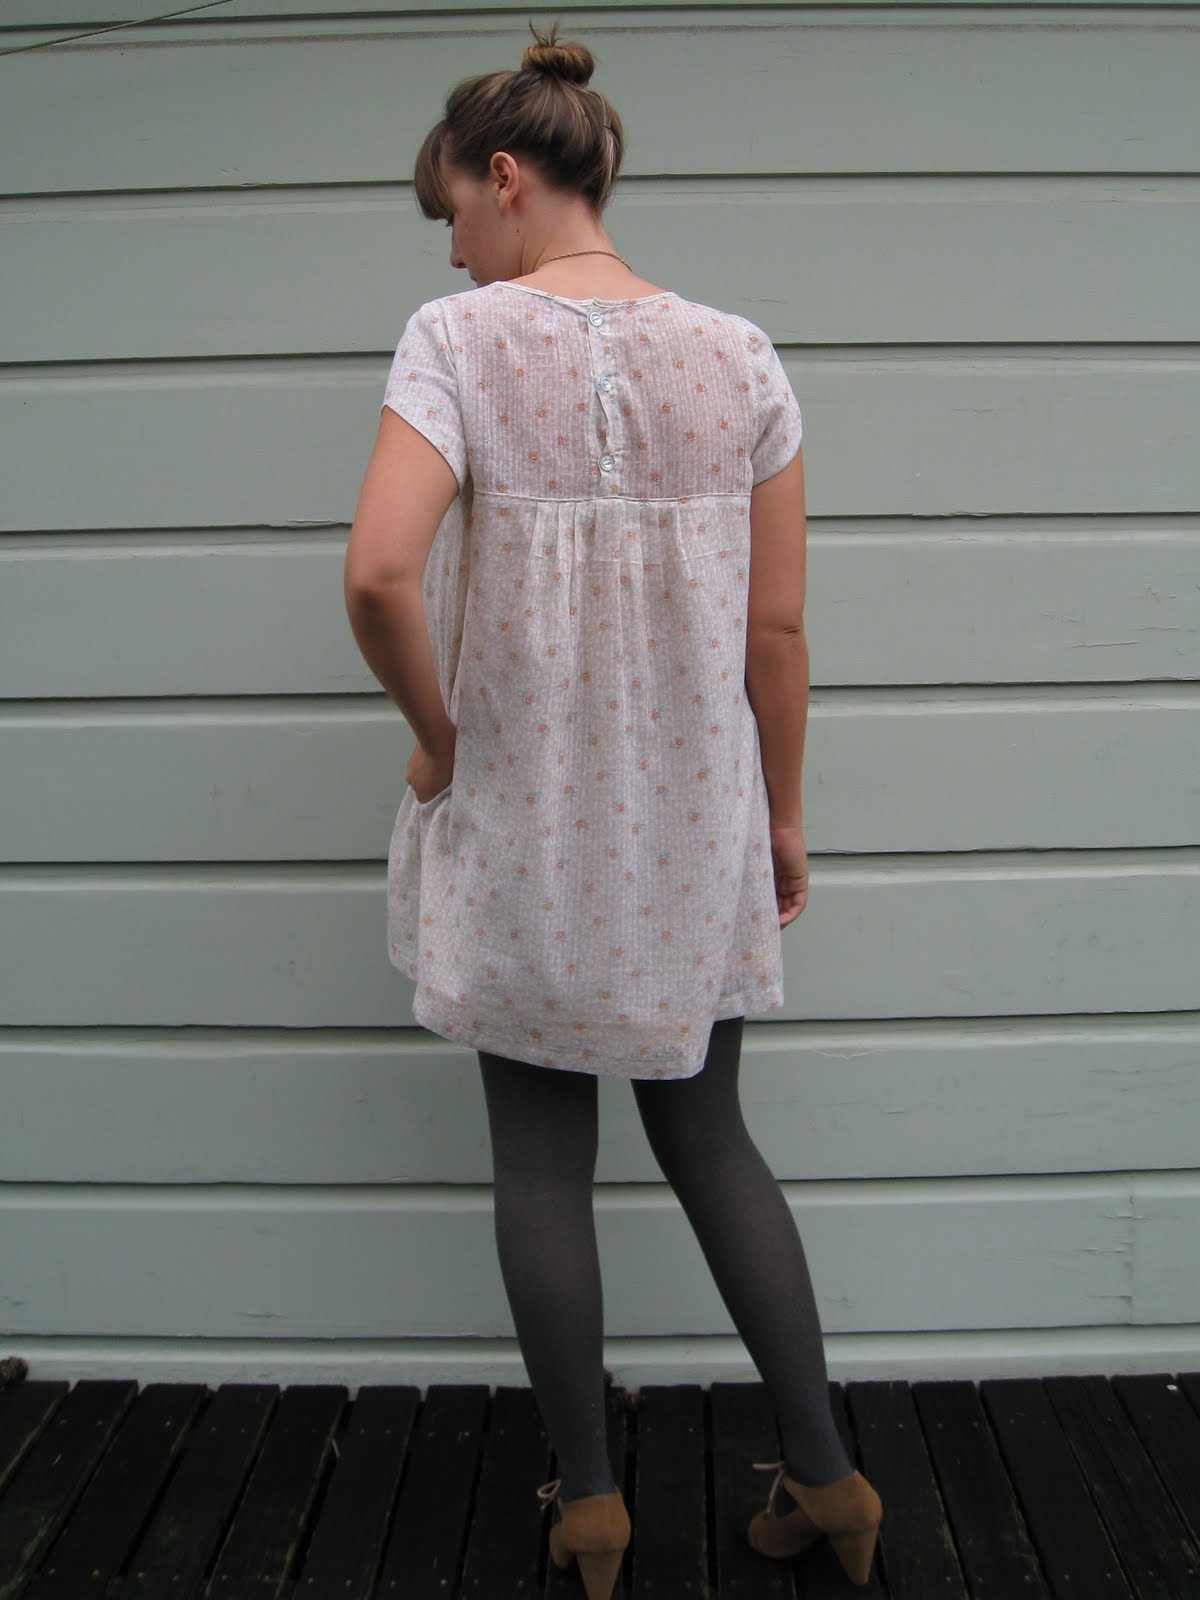
The first project is a dress that I made by altering Colette Pattern's Macaron dress. I kept the sweet heart yoke and scalloped sleeves, but I changed the back yoke to be buttoned down, and I changed the body of the dress to be a pleated a line shape. There are pockets in the side seams and the lining for the dress has lace on the hemline for some added pretty.
At first I worried that it would look too much like a nightgown, but now I don't mind because it sure is comfortable to wear out and about.


The second project is a blouse with a petal collar. I used the JJ Blouse pattern from BurdaStyle, but used the sleeves from the Macaron dress pattern, and made the collar a bit more interesting. I considered doing a peter pan collar, but then I remembered all the lovely petal collars that I've drooled over on dresses from Nadinoo and decided to try one for myself.
Since I've made the JJ Blouse about 4 times before, the beginning of this project went rather quickly. I did have to take some extra time to make french seams since the fabric likes to unravel at the edges. The collar was probably the most time consuming as I had to first create a pattern, then sew 7 individual petal pieces, and finally attach them to the blouse.