Showing posts with label Sewing. Show all posts

Saturday, September 28, 2013

More Tie Dye and a Hemlock Tee

I was fortunate to spend part of my week camping along the California coast, and I have to admit I spent more than a day in my comfy new Grainline Hemlock Tee. I'm still a bit intimidated by knits and my serger, but I decided to get over it and make this tee, and I'm so happy that I did! The pattern is quick to make and the finished result is just the right amount of slouchy and comfortable.

The other part of this outfit are my new favorite leggings! Well sort of, I love the tie dye, but the pattern needs some adjustments. I used BurdaStyle's Carol Leggings pattern since I already had it in my pattern collection. I'm planning on reading some tutorials to adjust the fit for the next time. The leggings are made from white stretch cotton that I tub dyed gray and then tie dyed with black, fuschia, and deep purple. 


Tuesday, September 10, 2013

Tie Dye Elisalex


When I was living in my grandparents house I had a pretty set routine when it came to sewing and blogging. With ready access to a washer and dryer I could wash fabric as soon as I bought it and get straight to work sewing, and easily work on special dye projects. Once I made something new I would just head out to the back porch with my tripod and camera for some blog photos. 

My new apartment has made a change in my routine. I have to wait patiently for our trips to the laundromat in order to prepare my fabric for sewing, it's torture! But on the other hand, I'm finding that having to search for a special spot for photos is rather enjoyable. Yesterday while we were out on an evening run I spotted these hydrangeas and knew they would make the perfect backdrop for my latest Elisalex dress!

I recently purchased the book "Tie Dye: Dye It, Wear It, Share It," by Shabd Simon-Alexander. I've been in awe of her work for quite some time, so I was excited when I found out about her book. This dress is made from an out of use curtain that I tie dyed using a technique from the book that involves folding like a fan, binding with string, and then dyeing. Once the dye process was complete, I reached for my Elisalex Dress Pattern from By Hand London. I love the bodice of this pattern, but yet again my fabric didn't lend itself to the structured skirt so I substituted a simple gathered skirt. This finished dress is exactly what I imagined for the fabric, so I'm one happy camper.

PS: Any of you other lovely sewing bloggers have tips for feeling comfortable taking project photos out in public? I'm still feeling a bit shy!


Monday, May 13, 2013

Watercolor Elisalex Dress

This post is rather overdue! I made this dress long ago and absolutely love wearing it, both during the day while running errands as well as out for date night with a pair of heels. The shape of the bodice is gorgeous the way it sweeps out over the shoulders and dips down in the back! However, as much as I enjoy wearing it, the light colored fabric hasn't enjoyed my attempts at photography until now.

My By Hand London Elisalex Dress has the original bodice from the pattern and a simple gathered skirt since my fabric was too flimsy for the tulip shape. To make the skirt a bit more interesting, I added pleats just above the hem.

Is anyone else excited to get their paws on the new Victoria Blazer Pattern from By Hand London? I'm super into the idea of a sleeveless version and especially love the one they sewed up in plaid!


Sunday, May 12, 2013

Elizabeth II


Trips to the fabric store are mostly for zippers and thread since I have a pretty big fabric stash that needs attention. However, my favorite local shop keeps bringing in woven fabrics that I just can't resist! After buying a few yards of this gorgeous stuff, I decided to create another variation of the Elizabeth Gathered Waist Dress from BurdaStyle's Sewing Vintage Modern. Remember the first one I made?

This Elizabeth has split shoulders with button closures, one side seam pocket, invisible side zip, and an altered neckline in the front and the back. Once again, I enjoyed working with this pattern. The fit is wonderful and flattering, yet simple enough to make all sorts of fun variations. I definitely recommend trying it out!

These photos were taken with my cow friends outside the Denver Art Museum. I was in Colorado this past week with my family for my big sister's graduation from CU Boulder. I'm so proud of my sister, Dr. Clare!


Tuesday, April 30, 2013

Sewing for the home

This project combines two things that I almost never work on, home sewing and quilting. And even though these pillows are out of my ordinary sewing habits, I really enjoyed making them.

After it was decided that my family was going to sell my grandparent's house, I asked if I could have one of my favorite pieces of furniture from their house. It's a wood frame modern danish couch with dark blue cushions. While I was living with my grandma the past few years this couch was in front of the living room picture window overlooking the park. I loved sitting there with a blanket, book, and cup of tea while my grandma read the newspaper in her go-to arm chair. (Pictured in the project photos is the desk chair that matches the couch).

Once I moved to my boyfriend's apartment, I decided to make some pillows to go with my favorite couch. I used some of my own tie dye cotton plus a thin linen curtain I found in my grandma's closet while we were clearing out the house. I played around with some triangles and tried my hand at quilting! Quite fun actually! Both have linen for the back with an overlapping flap and bronze snap closure. 

If you would like to make a zig zag pillow, head over to the blog Oh, Fransson! by Elizabeth Hartman. My interest in trying out some quilting was sparked by the tutorial on Piano Pillows.

My heart aches when I think about how I will no longer be able to visit my grandparent's house. However, I'm happy to incorporate some of their furniture with my own as a reminder of all the wonderful times I had there with them.


Thursday, April 25, 2013

Archer goes camping!

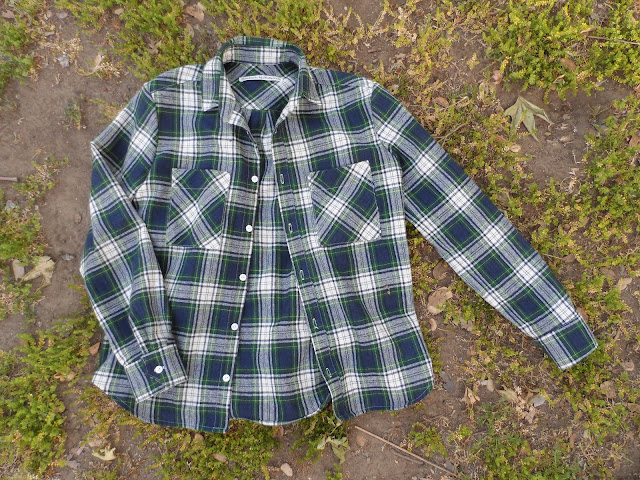
 I love Grainline Studio patterns, and the Archer Button Up Shirt pattern has already been added to my list of favorites! I've used it twice and took my wool version camping (and boating!) with me the past few days. The shirt is made from thrifted plaid wool and buttons from a creative reuse center.


Thursday, April 11, 2013

Art deco print with a splash of pink


I was recently asked if I would like to do another project with Britex Fabrics (remember the dress I made for them last year?). Of course I jumped at the opportunity!
To make these pants I altered Grainline Studio's Maritime Shorts pattern and used some fantastic stretch cotton and wool from Britex Fabrics.
Check out all the details over on the Britex Fabrics blog!

Monday, March 11, 2013

A sneak peek at my By Hand London Elisalex Dress


I've been busy lately... searching for housing, crossing my fingers that I get the job I was recently interviewed for, and finding a few spare moments to work on some sewing. 

Although I haven't taken any photos with this dress on yet, I thought I would drop by to share this and encourage you all to join the Elisalex Dress Sewalong over on the By Hand London Blog! They are kicking things off today, so head on over and check it out! The pattern was really fun to work with, and I especially love the way that the back scoops down. Unfortunately, my fabric choice was a bit too flimsy for the tulip skirt of the dress, so I changed it up a bit. I'm on the lookout for tulip-worthy fabric now so I can make a second Elisalex Dress following the pattern directly, in all of it's flowery glory!

Thursday, January 17, 2013

Check it out! My Elizabeth Gathered-Waist dress is featured on BurdaStyle!

Sunday, January 13, 2013

Petticoat Excitement!


 I've wanted to make a petticoat ever since I first started sewing. After seeing the petticoat variation project for the Elizabeth Gathered-Waist Dress in BurdaStyle Sewing Vintage Modern, I decided to go for it and finally make one!

I searched for petticoat and tutu pictures for inspiration and read through a few different tutorials (including the variation project in the book). In the end though, I mostly improvised and played around with the fabric as I sewed.

I'm pretty excited about this latest addition to my wardrobe because now I can make any skirt pouffy!


Saturday, January 12, 2013

SPLIT BACK TINY POCKET TANK : THE TUTORIAL


 Anyone remember the Split Back Tiny Pocket Tank that I wrote about way back in July? I had at least one comment requesting a tutorial, so here we go!


The first thing that you will need is Grainline's Tiny Pocket Tank pattern, which is available for purchase online in a print at home format. This is seriously one of my all time favorite patterns. I have used it and altered it more times than I can count and I've never been disappointed with the results. 


STEP ONE : ALTER THE PATTERN

The best part of this tank variation is that you really only need to alter one pattern piece: the back. Begin by tracing the tank back face up on pattern paper. Next, flip the tank back face down and line up the center back of the pattern piece with the center back that you just traced. With the tank back face down, trace again along the neckline and up across the shoulder seam.


Using your straightedge, draw a line 3 inches away from the center back, shown above in red.


Using your straightedge, draw a line that is perpendicular to the red line and goes through the part of the pattern where the armhole and side seam meet. This line is shown above in gray. Note where the red line and gray line meet. This point of intersection will be used as a starting point for a curve.


Draw a curve from the intersection point mentioned above, to the bottom of the side seam. 


STEP TWO : CUT YOUR FABRIC


 Cut 1x center front on fold
Cut 2x altered back pattern piece. Place the original center back on the straight grain of the fabric. Also, make a mark along the neckline of each back piece to represent the placement of the original center back line. These marks will be lined up when we overlap the split back pieces.
Cut 1x neckline binding on bias grain.
Cut 2x armhole binding on bias grain.


 STEP THREE : SEW


For most of the sewing, you can follow the sewing tutorial from Grainline, but I will summarize my steps below.

Sew front darts and press. 

Use French seams to sew the sides and shoulders. 

Follow Grainline's tutorial to insert armhole bias binding on both sides.

At this point you will finish the hem of the tank. Don't forget that the "hem" of this variation runs all the way up along the curve that we made in the altered back pattern piece. I finished this hem using bias binding and Grainline's tutorial, but you can use your preferred hemming technique.

At this point all the edges will be finished, except the neckline, and the back will be open. Locate the marks that you made while cutting the back pattern pieces. Line up the marks and baste along the neckline where the two back pattern pieces overlap.
Finally, follow Grainline's tutorial to insert the neckline bias binding.

At this point you may also sew along the "hem" where the two back pattern pieces overlap. This will keep the split back from flying open.


STEP FOUR : ADMIRE YOUR WORK


Let me know if you end up making your own split back tiny pocket tank!
Happy sewing!