Saturday, January 12, 2013

SPLIT BACK TINY POCKET TANK : THE TUTORIAL


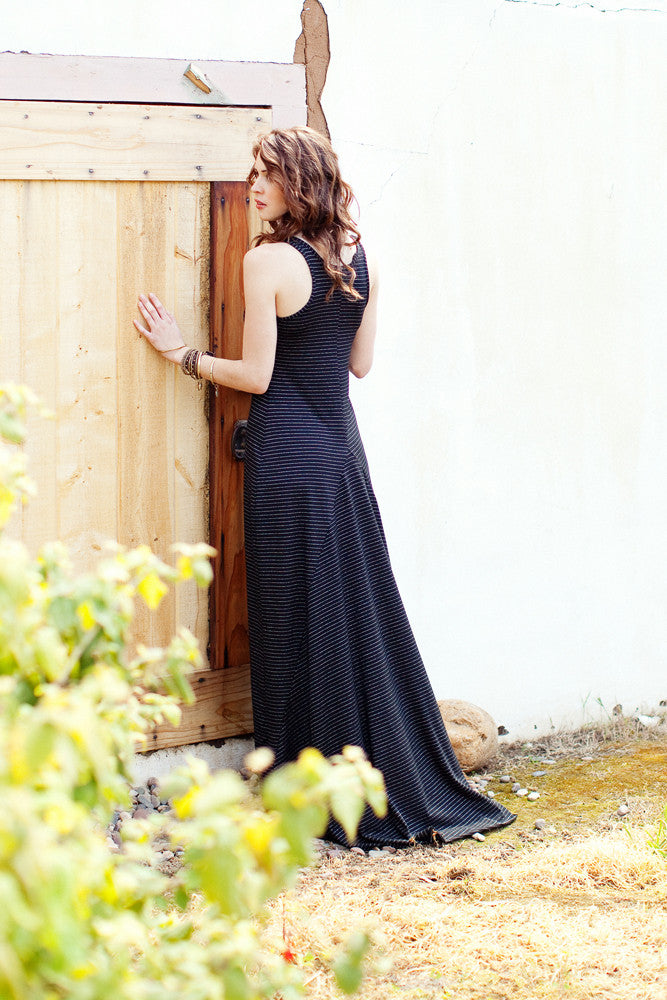
 Anyone remember the Split Back Tiny Pocket Tank that I wrote about way back in July? I had at least one comment requesting a tutorial, so here we go!


The first thing that you will need is Grainline's Tiny Pocket Tank pattern, which is available for purchase online in a print at home format. This is seriously one of my all time favorite patterns. I have used it and altered it more times than I can count and I've never been disappointed with the results. 


STEP ONE : ALTER THE PATTERN

The best part of this tank variation is that you really only need to alter one pattern piece: the back. Begin by tracing the tank back face up on pattern paper. Next, flip the tank back face down and line up the center back of the pattern piece with the center back that you just traced. With the tank back face down, trace again along the neckline and up across the shoulder seam.


Using your straightedge, draw a line 3 inches away from the center back, shown above in red.


Using your straightedge, draw a line that is perpendicular to the red line and goes through the part of the pattern where the armhole and side seam meet. This line is shown above in gray. Note where the red line and gray line meet. This point of intersection will be used as a starting point for a curve.


Draw a curve from the intersection point mentioned above, to the bottom of the side seam. 


STEP TWO : CUT YOUR FABRIC


 Cut 1x center front on fold
Cut 2x altered back pattern piece. Place the original center back on the straight grain of the fabric. Also, make a mark along the neckline of each back piece to represent the placement of the original center back line. These marks will be lined up when we overlap the split back pieces.
Cut 1x neckline binding on bias grain.
Cut 2x armhole binding on bias grain.


 STEP THREE : SEW


For most of the sewing, you can follow the sewing tutorial from Grainline, but I will summarize my steps below.

Sew front darts and press. 

Use French seams to sew the sides and shoulders. 

Follow Grainline's tutorial to insert armhole bias binding on both sides.

At this point you will finish the hem of the tank. Don't forget that the "hem" of this variation runs all the way up along the curve that we made in the altered back pattern piece. I finished this hem using bias binding and Grainline's tutorial, but you can use your preferred hemming technique.

At this point all the edges will be finished, except the neckline, and the back will be open. Locate the marks that you made while cutting the back pattern pieces. Line up the marks and baste along the neckline where the two back pattern pieces overlap.
Finally, follow Grainline's tutorial to insert the neckline bias binding.

At this point you may also sew along the "hem" where the two back pattern pieces overlap. This will keep the split back from flying open.


STEP FOUR : ADMIRE YOUR WORK


Let me know if you end up making your own split back tiny pocket tank!
Happy sewing!

Friday, January 11, 2013

Hello Again!

Hello! I'm back and hopefully this time it will stick! 
So let's dive right in, shall we?

Late last year I got an email from the lovely Jamie Lau of BurdaStyle, who is one of the authors of the new BurdaStyle book, Sewing Vintage Modern. In her email she asked me if I would like to try out one of the patterns from the book. I happen to be a sucker for dresses, especially when they are styled with a 1950s aesthetic, so of course I asked to do the Elizabeth Gathered-Waist Dress.

Awhile back, my mom gave me a set of vintage bandanas that she found while thrifting. I have been meaning to use them in a sewing project ever since, and the simple bodice of this dress pattern seemed like the perfect opportunity. To incorporate the bandana, I started by rounding off the square neckline of the pattern. Once the pattern pieces were cut in the main fabric, I positioned the bandana to my liking and cut it to match the pattern. Last I basted the neckline and straight stitched along the edges. 

After attaching the skirt to the bodice, I decided to add some pleats above the hem to make it a bit more interesting. I will admit that I wasn't very precise with this part and just eyeballed it as I sewed. Surprisingly it didn't turn into a disaster, and I'm super happy with the result!

I would definitely recommend this dress pattern. It is simple with a flattering fit, plus it is easy to alter and sew. I'm looking forward to trying some of the other variations for this pattern that are in the book, including the adorable Lillian Blouse.

BurdaStyle's new book was released back in December and they had a party at Britex Fabrics in San Francisco that I was lucky to attend. I wore this dress, purchased a copy of the book, and got to meet Jamie!


Tuesday, November 6, 2012

A Patriotic Pooch

Sometimes Election Day calls for some silly crafting, such as the patriotic bow tie I made for Mr. WigWag! It was a quick sew that resulted in so much added cuteness!

It has been far too quiet here lately, but I'm pushing myself to get back into the world of blogging. I have a bunch of stuff to photograph and share, a tutorial idea or two, and a few exciting projects in the works, so stay tuned!

Monday, August 20, 2012

It's been a few weeks since I last blogged, and I've gone back and forth on whether to share some recent sad news, but then I decided I couldn't go about my normal writing without acknowledging my grandma. She passed away two weeks ago and I'm completely heartbroken.
My grandma is my inspiration, my best friend, my mars bar, and so much of who I am is thanks to her. I miss her unwavering humor, wit, and love. 
Here's to you, Eileen Campbell Holt, there's nobody like you.

Sunday, July 29, 2012

Many Works in Progress

 I was on grandma helping duty this weekend and couldn't leave the house, so I got to work on a few projects to keep myself busy. I wasn't able to finish any of them, but here is a peek at what I was working on:
 I recently made a dress for BurdaStyle and Britex Fabrics, but before the final draft with the beautiful Britex stretch cotton, I made this practice bodice. I like it enough that I started working on making it a wearable practice piece. I kind of messed up on the skirt today because I made the mistake of watching The Olympics while sewing... oops!

 I made a tank top over a year ago that was meant to be practice, but of course I never made the final. I was left with a shirt that I like enough, but never wear because it is rather plain. Yesterday was the day to try tub dyeing it light blue!

My four maxi dresses left me with a lot of jersey scraps, so I've started working on a scrap rug. I braided a bunch of scraps and have been working on sewing the rope into a coil. Any ideas on how to keep it flat? My gran says to put a book on it overnight which just may be a great idea.

Saturday, July 28, 2012

Mission Maxi Plus the Color

 I've been wearing my Mission Maxi dress nonstop since I put it together, and now I finally took pictures to share on my blog!

My Mission Maxi was made from white cotton jersey which I tie dyed after the sewing was complete. For the tie dye I used two shades of black, plus pearl gray. I'm pretty happy with how the dye turned out, but I wish there weren't so many white spots.


My cousin and I also did the ombre dyeing for her dress, but she just took off to medical school in New Orleans, so I'll have to get her to send me some photos of her dress when she gets a chance. Do you like our ombre dyeing setup? Liz likes to follow directions when doing projects like this, but I made her get straight to it without measuring things out precisely. Her dress turned out great and we both had blue hands when we went to work the next day. Oops!

Tuesday, July 10, 2012

Mission Maxi Minus the Color

 Last night I put together my first Jamie Christina Mission Maxi Dress and I'm so excited about it!

Inspired by the tie dye Mission Maxi on True Bias, my cousin Liz and I decided to make our maxis in white jersey. I'm planning on tie dyeing mine in black and gray, while Liz is going to ombre dye hers blue. 

I haven't worked with jersey much before, so this isn't quite my best work. That stuff is tricky to cut out and to sew! But I think the flaws that I notice will become less clear once the dress is tie dyed.

Now that mine is done, I have to put together the second one for Liz without the godet. And then on to dye fun time!


Thursday, July 5, 2012

Split Back Tiny Pocket

Another Tiny Pocket Tank? Don't mind if I do. I've used this pattern tons of times, but it just never gets old! 

For this version, I altered the pattern to have a split back. Once the tank was made I sewed the split down along the edge because it was a bit too loose and shapeless in the front to leave it open. If I make another with the split back, I think I'll have buttons going along the back edge for some added interest.

Anyway, it's just a simple, comfy tank that I love to wear!
 

I hope everyone had a wonderful Fourth of July holiday! It's kind of weird to have that one day off in the middle of the week, but I sure did enjoy it! I ended up going on a hike over to a lake for some lounging and swimming.

Wednesday, July 4, 2012

Copycat

  I have a confession to make. I'm a no good, stinking copycat. As soon as I saw Jen's blog post on Grainline about her Arizona shorts, I knew that I wanted to make my own in a similar fabric. 

Well I lucked out on my own awesome fabric and made this pair of shorts from the same pattern I used awhile back for my coin button shorts.

Just like the coin button shorts, these shorts have big pockets, are trimmed with bias tape, and have an invisible side zip closure.


I've been getting a lot of use out of these shorts when the Bay Area decides to throw in a hot day, so please pardon my wrinkles!

Happy Fourth of July!

Monday, July 2, 2012

BurdaStyle x Britex Fabrics


I spent my last two weeks working with excitement on a project combining a BurdaStyle dress pattern with some gorgeous fabric from Britex Fabrics of San Francisco!

Well it's now complete and you can check out my project and a special blog post on BurdaStyle, plus a blog post on the Britex Fabrics website. Plus, if you happen to be in the Bay Area, you can check out the dress on display in store at Britex Fabrics!

Thursday, June 28, 2012

I just completed a special project and you can find a sneaky peak of it on the front page of Britex Fabrics! More to come soon!

Thursday, June 14, 2012

New Pattern Excitement

I received the Mission Maxi dress pattern from Jamie Christina Sewing Patterns in the mail today which is super exciting!

I decided to purchase this pattern after seeing it sewn up beautifully by a few of my favorite bloggers. I especially like Cirque Du Bebe's Tigerlily Maxi and the Tie Dye Maxi made by True Bias (oh how I love all things tie dye. I am from Berkeley after all).

Next step: buy jersey knit fabric! And then maybe a bit of practice working with jersey knit.

Anyway, I'm excited for new sewing projects so I thought I would share!
I'll be back soon with photos of the tank and shorts that I ended up sewing this past week. I'm on a sewing roll!